
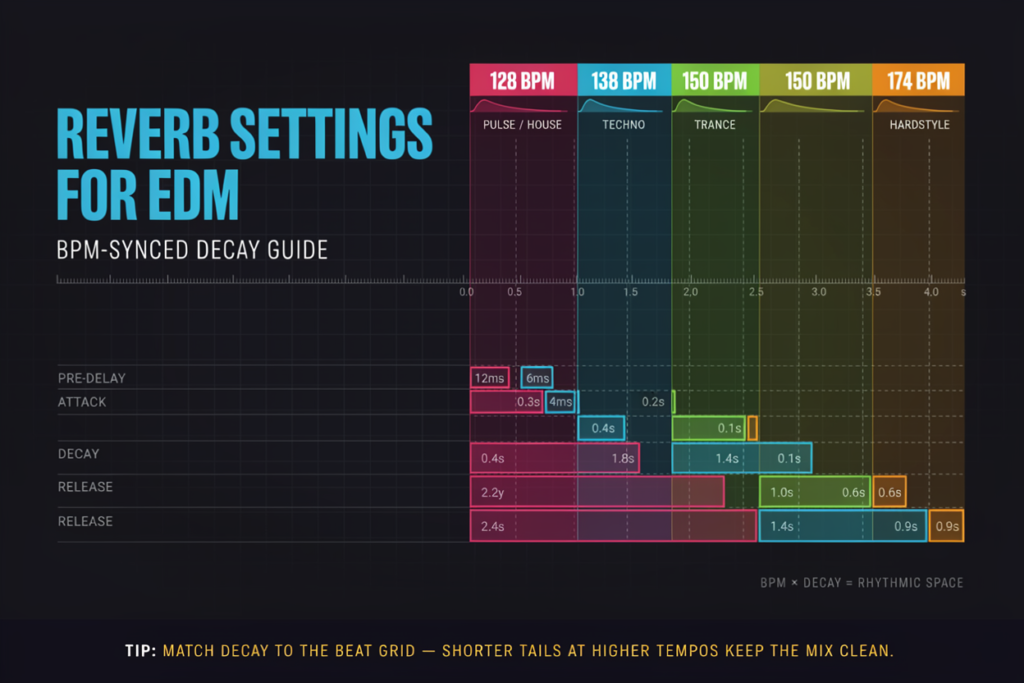
The best reverb settings for EDM keep the mix spacious while preserving punch, clarity, and low-end control. As a practical starting point, use 20–60 ms of pre-delay, about 0.4–2 seconds of decay for rhythmic sounds, and 2–6 seconds for pads or special effects. Filter the reverb return, keep the kick and sub-bass mostly dry, and duck long tails when they mask vocals or leads.
These values are starting ranges, not rules. The right setting depends on BPM, arrangement density, and each sound’s role. First, understand the relationship between reverb and BPM synchronization.
What Are the Best Reverb Settings for EDM?
The most reliable EDM setup uses short, controlled reverbs on drums and plucks; medium plate or hall reverbs on vocals and leads; and longer, automated tails on pads and transitions. Use reverb on an aux send when several sounds should share one space, then set the reverb plugin to 100% wet and control the amount with each channel’s send level.
Recommended Starting Settings by Sound
| EDM element | Reverb type | Pre-delay | Decay time | Return filtering | Practical use |
|---|---|---|---|---|---|
| Lead vocal | Plate or hall | 30–80 ms | 1.2–2.5 s | High-pass around 150–300 Hz | Add depth while keeping words forward |
| Vocal chop | Plate or room | 15–50 ms | 0.5–1.5 s | Remove low mids as needed | Match the groove without blurring edits |
| Lead synth | Plate or hall | 20–60 ms | 1–2.5 s | High-pass around 150–400 Hz | Create width and depth behind the dry lead |
| Pluck or arp | Room or plate | 10–35 ms | 0.3–1.2 s | High-pass around 250–600 Hz | Preserve attack and rhythmic definition |
| Pad or chord layer | Hall or shimmer | 0–40 ms | 2–6 s | Remove lows; damp bright highs if harsh | Build atmosphere in breakdowns |
| Clap or snare | Plate or gated room | 5–30 ms | 0.3–1.2 s | High-pass around 200–500 Hz | Add size without washing over the next hit |
| Percussion | Small room | 0–20 ms | 0.2–0.8 s | Remove unnecessary lows | Place separate hits in one believable space |
| Kick and sub-bass | Usually none or very short room | 0–15 ms | 0.1–0.4 s | Aggressive high-pass if used | Keep sub frequencies direct and controlled |
| Risers and impacts | Hall, shimmer, or effect reverb | 0–80 ms | 2–8 s | Shape to fit the transition | Automate for tension and release |
The frequency values are starting points, not fixed crossover rules. The source should determine the final filtering. A guide to reverb frequency response explains why presets with the same decay can occupy different amounts of space.
Why These Settings Are Not Universal Presets
A sparse breakdown can support a six-second hall that would overwhelm a dense drop. Set reverb in the full arrangement, because masking and overlapping tails are often hidden in solo.
How Do You Sync Reverb to an EDM Track’s BPM?
Calculate a quarter note in milliseconds with 60,000 ÷ BPM, then divide or multiply it for other note values. Tempo-related timing helps the tail follow the groove, but still adjust by ear.
Worked Example at 128 BPM
At 128 BPM:
| Note value | Calculation | Duration |
| Quarter note | 60,000 ÷ 128 | 468.75 ms |
| Eighth note | 468.75 ÷ 2 | 234.38 ms |
| Sixteenth note | 468.75 ÷ 4 | 117.19 ms |
| Half note | 468.75 × 2 | 937.50 ms |
| Whole note | 468.75 × 4 | 1,875 ms |
Suppose a pluck needs a total reverb event lasting one eighth note. With 25 ms of pre-delay, a useful decay starting point is 234.38 − 25 = 209.38 ms. Plugins measure decay differently, so treat the result as a musical reference. The reverberation-time guide explains how decay measurements relate to perception.
Choosing the Right Subdivision
Sixteenth- or eighth-note relationships suit fast plucks and percussion. Longer divisions work for vocals, pads, and breakdown effects. Shorten an exact value for a cleaner gap or lengthen it for overlap.
How Should You Set Reverb for Different EDM Elements?
Protect the attack of rhythmic foreground sounds, give melodic elements depth, and reserve the longest tails for sustained or transitional layers. A shared short room can create cohesion.
Vocals, Leads, Plucks, and Pads
For a lead vocal, 30–80 ms of pre-delay can separate dry words from the wash. Start with a plate or hall around 1.2–2.5 seconds, then use EQ and ducking. These vocal reverb techniques help when a wide instrumental competes with the center vocal.
Lead synth returns may need stronger high-pass filtering to avoid masking chords and bass. Plucks usually need shorter decays, while pads can carry long halls or shimmer tails until the drop arrives.
Drums, Kick, and Sub-Bass
Claps and snares commonly take a short plate, room, or gated reverb. Let the decay clear before the next backbeat unless smearing is intentional. See the guide to using reverb on drums for an element-by-element method.
Kick drums and sub-bass are usually kept dry because low-frequency reverb consumes headroom and weakens rhythmic focus. If a kick needs ambience, send only its upper-frequency click or use an extremely short, high-passed room. Do not let the return reproduce the sub fundamental.
Risers, Impacts, and Transitions
Long halls, reverse reverbs, and shimmer effects can connect sections. Automate the send before a breakdown, then cut the return at the drop so the first kick lands cleanly.
How Do You Keep EDM Reverb Clear and Punchy?
Filter unnecessary frequencies, use pre-delay to protect transients, duck long returns, and automate sends between sections. These controls usually matter more than a preset name.
Filter and Shape the Return
High-pass filtering removes unnecessary low end. Low-pass filtering or high-frequency damping pushes the return behind the dry sound. Sweep filters in the full mix and stop before the effect becomes thin or dull.
Protect Transients With Pre-Delay
Pre-delay is the gap between the dry signal and reverb onset. Longer values keep foreground sounds forward; shorter values fuse them to the room. See the guide to setting pre-delay.
Duck and Automate Long Tails
Sidechain a compressor on the reverb return from the dry vocal, lead, or drum. The return drops under the source and rises into gaps. Use moderate reduction and a release that recovers musically.
Automation can reduce reverb in busy drops and increase it in breakdowns or phrase endings.
What Common EDM Reverb Mistakes Should You Avoid?
Common mistakes include reverberating too much low end, using long tails everywhere, confusing insert and send-return mix, and judging effects only in solo.
- Keep aux reverbs fully wet; use the send or return fader to set the amount.
- Avoid placing every source in a different unrelated space.
- Shorten or duck tails that overlap the next phrase or downbeat.
- Check the return in mono for phase or balance problems.
- Compare at matched loudness, because a louder effect often seems better temporarily.
If the mix still feels cloudy, follow a systematic reverb-mixing workflow and adjust one variable at a time.
Frequently Asked Questions
How much reverb should an EDM track have?
An EDM track should have enough reverb to create depth and contrast without softening the groove. Start with low send levels, raise the return until its space is clear, then reduce it slightly and recheck during the busiest section.
What reverb works best for EDM vocals?
Plate and hall reverbs are dependable choices for EDM vocals. Try 30–80 ms of pre-delay and 1.2–2.5 seconds of decay, then filter and duck the return so the lyrics remain intelligible.
Should you put reverb on an EDM kick or sub-bass?
Keep the kick and sub-bass mostly dry. If ambience is needed, use a very short reverb on the kick’s upper-frequency layer and high-pass the return aggressively so it does not reproduce sub energy.
Should EDM reverb be an insert or a send?
An aux send is usually more flexible because multiple channels can share one reverb while retaining independent send levels. Inserts are useful for sound-design effects or when one source needs a unique wet/dry treatment; review the wider DAW reverb settings when choosing a routing method.
How can EDM reverb sound wide without becoming muddy?
Use a stereo return, remove unnecessary lows and low mids, preserve the dry signal in the center, and duck the tail under important foreground sounds. Width should come from controlled contrast, not simply from increasing the wet level.

Noah Bennett is an audio engineering writer and acoustics specialist at Reverb Calculator. He focuses on reverb time calculation, room acoustics, studio sound design, and music production tools for producers, audio engineers, musicians, and home studio creators.